



TrueHash
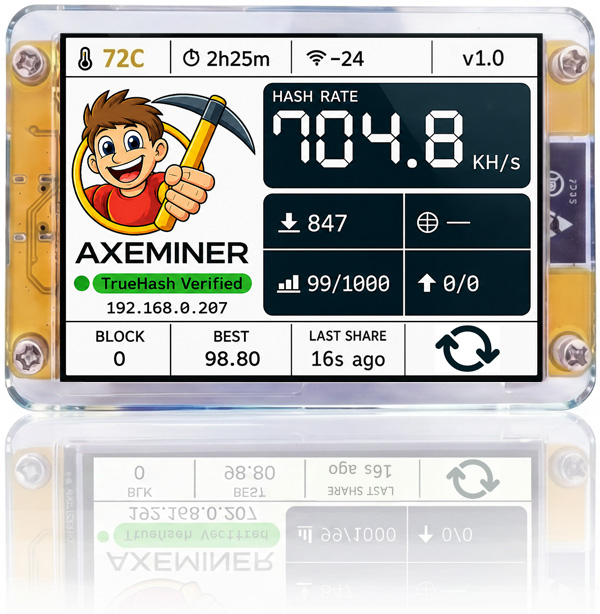
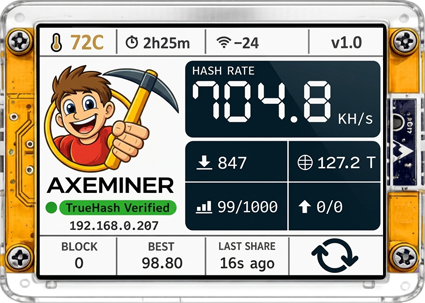
TrueHash is the world's first on-device, AI-optimized hashrate verification technology. It continuously monitors hashrate against a learned baseline and alerts on real-time degradation, stalls, or unexpected patterns.

TempSense
AI precision meets thermal monitoring. Continuously monitors device temperature and alerts on thermal runaway, sudden spikes, or sensor failures.

AxeArray
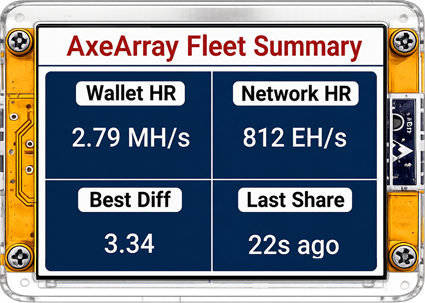
Mining apps charge monthly fees just to show you what your own miners are doing. AxeArray is a live on-device fleet summary of every miner connected to your wallet — no external app, browser, or subscription fee required. Fleet-level telemetry works exclusively with the AxeMiner FleetSense™ Solo Mining Pool.

AxeAtlas
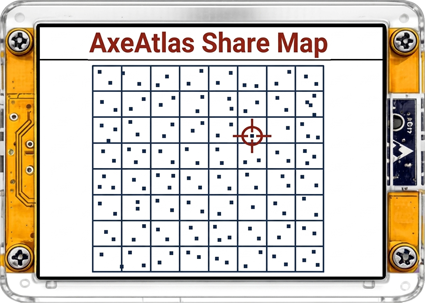
A real-time discovery map that provides a live visualization of your AxeMiner's journey through the Bitcoin nonce space, plotting each share discovery as it happens. AxeArray tracks your submitted shares across a rolling 12-hour window.

ZenMode
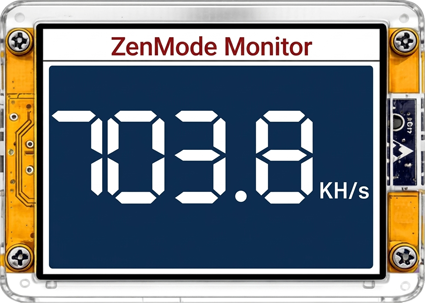
Achieve visual nirvana by emptying your screen of earthly distractions and dashboard clutter. Toggle this mode to transcend the noise, leaving only the hashrate on-screen for more focused monitoring.

Power It On
Connect your Axeminer to a USB power source (such as a phone charger, power bank, or computer) via USB port. Be sure to use the USB cable included with your AxeMiner because not all USB cables are compatible.
Connect to WIFI Network
A QR code will appear on your Axeminer’s LCD display.
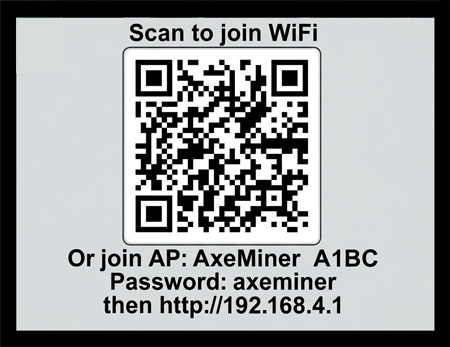
To connect with your smartphone, simply scan the QR code. To connect with a computer, your Axeminer will appear as a local WIFI network named “AxeMiner_XXXX”, simply select the AxeMiner network and enter the password “axeminer” to connect.
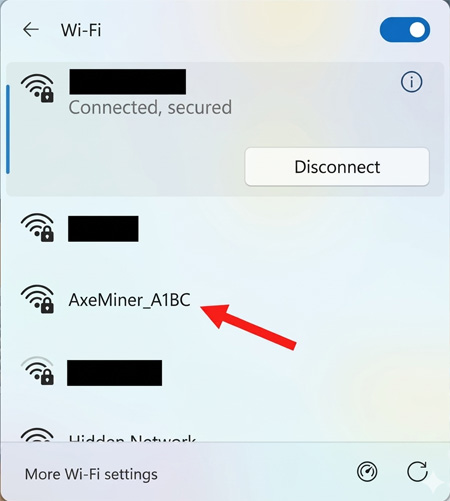
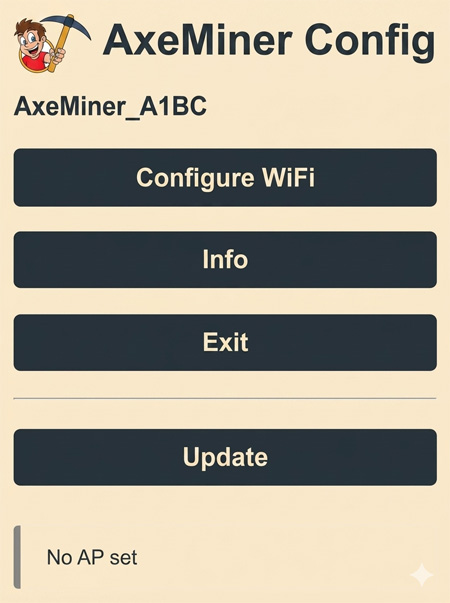
Upon connecting to your AxeMiner’s WIFI network, your internet connection will be temporarily disabled, and a config screen will appear.
Note: It may take up to 60 seconds for the config screen to appear, and you may temporarily see an error screen like the one shown below or a blank screen; this is not a cause for concern.
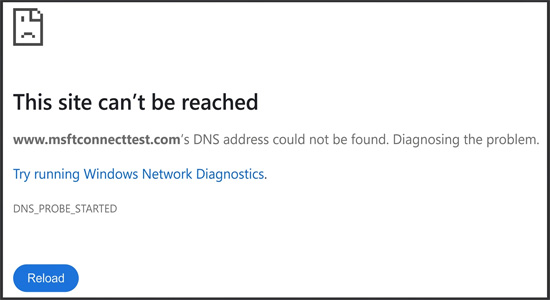
If the config screen does not appear after waiting the full 60 seconds, you can populate the config screen by typing 192.168.4.1 into the URL field of your browser.
Configure WIFI Network
Once connected to “AxeMiner_XXXX”, the config menu appears as shown below. It may take up to 60 seconds for config menu to appear. Click on “Configure WIFI”.
Note: If more than 60 seconds goes by while trying to access the config menu, you can access it by typing 192.168.4.1 into the URL field of your browser.
After clicking on “Configure WIFI”, it may take up to 60 seconds for the config dashboard to appear. If config dashboard does not appear within 60 seconds, enter 192.168.4.1 into the URL field of your browser. This will take you back to the config menu and you can try again.
Most of the settings are pre-configured for ease of use. You will need to select your 2.4 GHz WIFI network (SSID) from the list of local WIFI networks that populates at the top of the config page as shown below. Note: Axeminer only works on a 2.4 GHz WIFI network.
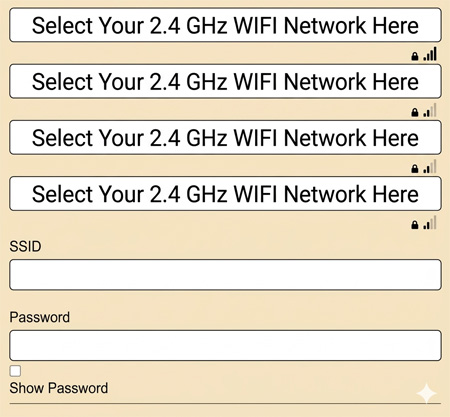
After selecting your 2.4 Ghz WIFI network name from the list, enter your WIFI password, and then move on to configure your primary and backup mining pools.
Configure Mining Pool
The “Worker Name” defaults to “Axeminer”, but you can make this whatever you want.
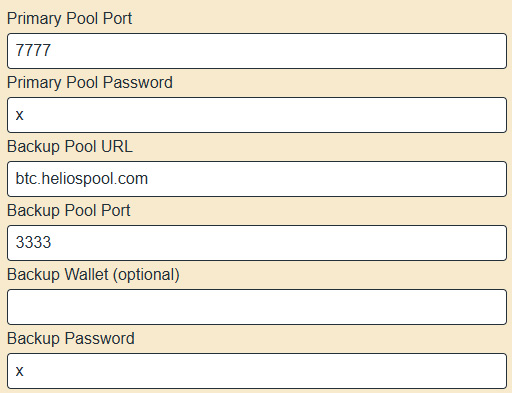
The primary and backup pool URLs are pre-configured for you, however you can change these anytime you want to a pool of your own preference. If the primary pool experiences an outage, your Axeminer will automatically switch over to the backup pool so that mining will not be interrupted.
Paste your Bitcoin wallet address in the Primary and Backup pool wallet address fields. This is the wallet that will receive your funds if you earn any Bitcoin. (Note: If you leave the backup wallet blank, it will default to your primary wallet.)
Additional Settings
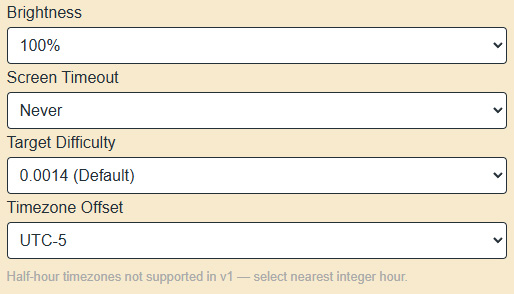
These settings are all optional. You have the option to make customizations to the device brightness, screen timeout, mining difficulty, and time zone.
Check Your Mining Stats
Toggle to the AxeArray screen for a live on-device summary of every miner sharing your wallet address.
Prefer a bigger view? You can also track your mining stats via wallet address at Axeminer.com, the default pool for your AxeMiner device. If you connect your device to a different pool than Axeminer.com, you need to access your mining stats via that alternate pool instead.
Note: It can take up to an hour after connecting for your miner to appear in your pool’s dashboard — don’t be alarmed if it isn’t visible right away.
My AxeMiner Will Not Power On
Make sure you are using the USB cable that was included with your USB Bitcoin miner. Your AxeMiner can only be powered with a USB A to USB C cable, which is included with your purchase.
You may be able to use a different USB A to C cable, however other USB cable combinations will not work; for example a USB C to C connector cannot be used.
If you have already installed the protective acrylic case that is included, make sure all the screws on the case are properly aligned and screwed in securely before attempting to power the unit on.
Device Not Populating a Local Network
If you have waited the full 60 seconds, and your AxeMiner does not populate a local network, as shown below, simply exit the WIFI manager of your computers operating system (OS), wait 30 seconds, and then re-enter the WIFI manager. Upon re-entering the WIFI selector of your computers OS, you will see your miner’s local network appear within 60 seconds.
Device Not Hashing and IP Address is Missing
A frozen or zeroed-out hashrate does not mean your device is broken. An IP address of “0.0.0.0” simply means the device failed to connect to your Wi-Fi. This usually happens for three reasons:
Incorrect Wi-Fi password: Double-check your spelling and capitalization.
Wrong Wi-Fi frequency: You accidentally connected to a 5GHz network instead of the required 2.4GHz network.
Router Firewall: Your routers firewall is blocking your miner’s internet connection.
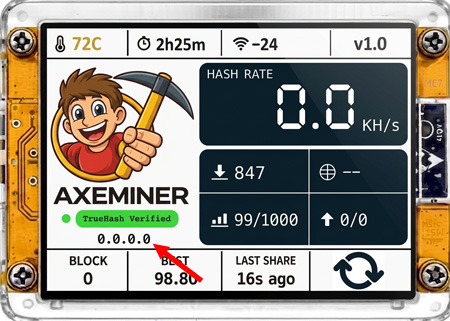
To fix it, unplug the device for 30 seconds, then plug it back in. Within 60 seconds, it will populate it’s own WIFI network named “AxeMiner_XXXX”. Connect to that network using the password “axeminer”.
To fix it, unplug the device for 30 seconds, then plug it back in. Within 60 seconds, it will re-populate it’s own WIFI network named “AxeMiner_XXXX”. Connect to that network using the password “axeminer”.
Within 60 seconds a config menu will appear in your web browser. If your web config menu does not appear after waiting a full 60 seconds, enter 192.168.4.1 into the URL field of your browser to populate the config menu. Please wait up to 60 seconds for the config menu to appear.
If the config menu does not appear after waiting the full 60 seconds, double check to make sure you are still connected to your AxeMiner’s WIFI on “AxeMiner_XXXX”. The config menu will not appear if you are not connected to your AxeMiner’s local WIFI network.
If not connected, reconnect to your AxeMiner’s local WIFI network using the password “axeminer,” and then reenter the IP address 192.168.4.1 into the URL field of your browser to populate the config menu. Then look for, and fix, any or all of the following errors to get your device mining properly:
1-Check to make sure you are connected to a 2.4 GHz WIFI network. Most home routers broadcast both a 2.4GHz and a 5GHz signal; make sure you have selected the 2.4 GHz network.
2-Check your WIFI password. Even if you are certain you typed it correctly, please double check. Try using the same WIFI password to connect to another household device and see if it connects. 90% of the tickets we receive for “zero hashrate” are simply misspelled WIFI passwords. Remember that passwords are case-sensitive.
3-Disable your home routers built-in firewall protection. This is more rare, as most router firewalls do allow mining; however some router firewalls mistake home mining for malicious activity (Asus routers especially are known for this).
If disabling your routers firewall solves the problem, you can choose between leaving the firewall off, or keeping the firewall on and whitelisting your AxeMiners IP address. Because router interfaces vary widely, you’ll need to reference your router’s instruction manual for instructions on whitelisting your AxeMiner within your router’s built in firewall.
Device Not Hashing and IP Address is Visible
A frozen or zeroed-out hashrate does not mean your device is broken. Because your IP address is visible, your WIFI connection is successful, but your mining pool or wallet configurations are incorrect.
This usually happens for three reasons:
Invalid Wallet: Check your wallet address to make sure it is the correct length and format. AxeMiner cannot mine without a valid wallet address. Your Bitcoin wallet address should be 42 characters in length and begin with a “bc1q” prefix. Be sure you are using the Bitcoin “Receive” address from your mining wallet.
Invalid Pool Credentials: Check your pool URL for any typographical errors or misspelled words, and be sure you’ve entered the correct port for your mining pool. In order for the hashrate to zero out, either both your primary and backup pools must contain errors, or you have no backup pool set and your primary pool contains errors. If only the primary pool contains errors, and your have a backup pool set, the device will simply revert to the backup pool for mining.
Pool Crash: Mining pools are hosted on web servers and therefore up time is not 100%. This is why your device has a backup pool option. If your primary pool crashes, the device will simple mine within your backup pool until your primary pool is back up. However if you have only a primary pool set, and that pool crashes, your AxeMiner will stop mining until that pool comes back online.
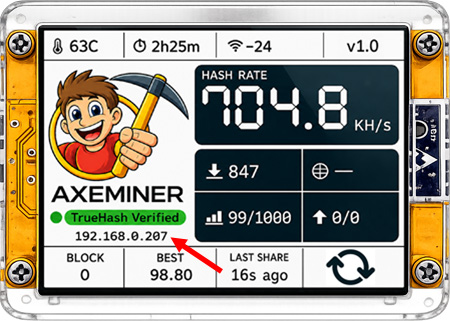
Note: The image below only shows the location of the IP address. Your AxeMiner has a unique IP address, it is not the one shown here. If you have multiple devices, each one will have its own unique address.
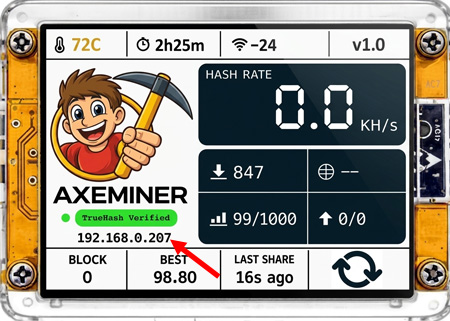
If you have only a primary pool set, and that pool crashes, there is nothing you can do except wait for that pool to come back online. For wallet or pool configuration errors, there is a fix. Type your miners unique IP address into the URL field of your browser. Please wait at least 60 seconds for the config menu to load in your browser. When the config menu appears, click on “Configure WIFI”, and the config dashboard will appear within 60 seconds.
Correct any pool and/or wallet errors in the config dashboard and hit “Save”. Your device should start mining again within 60 seconds. For pool and wallet changes, you do not need to restart your AxeMiner after making changes.
My AxeMiner Doesn't Show Up In My Mining Pool
ESP32 solo miners, such as AxeMiner, don’t show up in mining pools immediately. Due to their energy efficiency, these microcontrollers take more time to generate the same volume of mining activity as higher-powered mining hardware. Your AxeMiner should show up in the pool within 15 to 60 minutes.
If it’s has been more than an hour, and your device still is not showing up in the pool, take the following steps:
1-Make sure your device is actually mining. If not, refer to the appropriate troubleshooting bullet to get your device mining again.
2-Check your backup pool. If your primary pool crashed, or was not configured correctly, your device will automatically switch to your backup pool.
3-Make sure the pool you’re connected to is compatible with ESP32 solo miners. Some pools do not support low hashrate lottery miners and thus your device will never show up in their pool. For a directory of mining pools that support small miners, visit AxeFriendly.com.
AxeArray Only Showing Device Hashrate
AxeArray is a screen that offers real-time telemetry of your entire fleet at the wallet level when connected to the Axeminer FleetSense Mining Pool.
If your AxeMiner is connected to a different mining pool, the AxeArray screen will default to your device hashrate.
Even when connected to the FleetSense Mining Pool, AxeArray shows wallet level metrics. Any devices mining on a different wallet address will not show up within your AxeArray Fleet Summary, even if they are connected to the FleetSense Mining Pool.
If your solo miner is configured to the Axeminer FleetSense Mining Pool, and you’ve confirmed that all devices share the same wallet address, and you’re still seeing only your device hashrate, confirm that your device hasn’t switched over to your backup mining pool.
What is Solo Mining?
Skip the split! Unlike pool mining, which forces you to split your Bitcoin reward among thousands of pool participants, solo mining lets you compete for the entire block reward by yourself. With a chance to win approximately every ten minutes, if your device hits a block, the payout of 3.125 Bitcoins is all yours (minus any pool fees).
Some mining pools charge a pool fee, also referred to as a “block fee”. These fees typically range between 1% and 2% of winnings, and only apply if you actually hit a block (i.e.- if you earn Bitcoin). It’s reasonable to charge a fee since pools cost money to run. AxeMiner’s default pool Axeminer.com does not currently charge a block fee, however AxeMiner’s backup pool, Helios, does charge a modest 1% fee. You are not required to use the mining pool’s which are pre-programmed into your device, but the device does require a mining pool to run.
What is a Bitcoin Block?
The Bitcoin network uses cryptographic puzzles to secure the financial transactions that it facilitates. Bitcoin miners attempt to solve these puzzles to earn Bitcoin. A new puzzle is released approximately every ten minutes, and the first miner to solve the puzzle wins a “block” of 3.125 Bitcoins.
Which Wallet Should I Use For Mining?
For ESP32 lottery miners like AxeMiner, it is highly recommended that you use a Bitcoin wallet address with a “bc1q”prefix (native SegWit).
Avoid using a Bitcoin address from a standard crypto exchange like Coinbase or Robinhood. Exchange addresses may not support direct mining pool payouts. Most esp32 miners work well with self-custody wallets like TrustWallet.
Note: Be sure you are using a Bitcoin (BTC) wallet address and that you select the BTC “Receive” address for mining.
What is AxeMiner's Hashrate?
AxeMiner can hash up to 700 KHs!* While not as fast as NMMiner, AxeMiner puts emphasis on “quality over quantity” by adding features not found in other miners, such as hashrate verification, thermal intelligence, real-time share mapping (AxeAtlas), and on-device fleet statistics (AxeArray).
NMMiner claims 1,000 KHs. AxeMiner verifies 700 KHs. In solo lottery mining, the number you can trust is worth more than the number you can’t.
*Hashrate is not guaranteed. All hashrates shown or referenced on this Site are approximations.
What Coins Does AxeMiner Mine?
AxeMiner is engineered exclusively for Bitcoin, leveraging optimized SHA256 performance.
How Do I Connect to a 2.4 GHz Network?
AxeMiner can only connect to a 2.4 GHz WIFI network. Most routers default to broadcasting both a 2.4 GHz and 5 GHz network simultaneously. When setting up your AxeMiner, look for a network labeled with “2.4G,” “2G,” or “2.4GHz”, and connect.
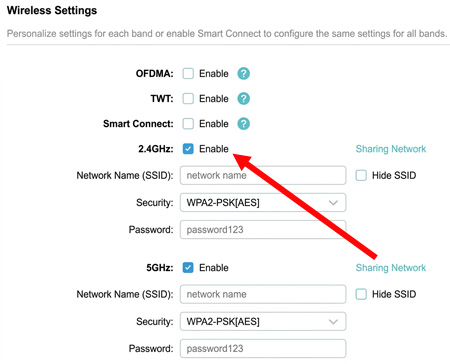
In some rare cases, your router may not automatically create a 2.4 GHz WIFI network. You will need to manually enable a 2.4 GHz network from within your router settings.
The graphic below is just one example — router interfaces vary widely, so please refer to your router manufacturer’s instructions for setting up a dedicated 2.4 GHz network.
How Does TrueHash Work?
TrueHash is the world’s first on-device, AI optimized hashrate verification technology. It continuously monitors hashrate against a learned baseline and alerts on real-time degradation, stalls, or unexpected patterns. Every device purchased includes a lifetime subscription to TrueHash on that device.
The TrueHash pill located directly below the AxeMiner logo on the bottom left of your miner’s display has four distinct indicators:
TrueHash Green: Healthy; your miner is hashing as expected.
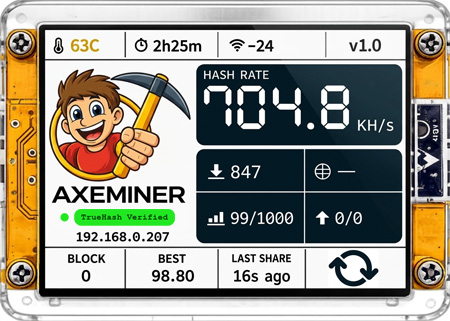
TrueHash Yellow: Analyzing; TrueHash is analyzing your hashrate to learn the baseline it should measure against. Seeing your device flash yellow is not a cause for any concern. AxeMiner continuously monitors hashrate to maintain an accurate baseline to test against.
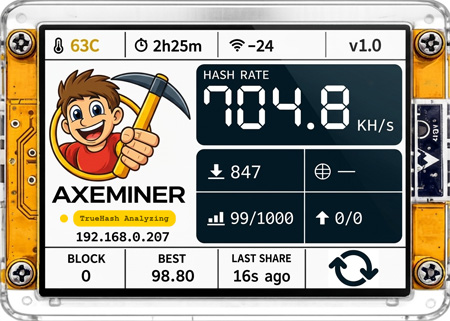
TrueHash Flashing Red: Activated; your hashrate has fallen below the expected baseline.
Note: It is normal for TrueHash to flash red during the initial device startup, as this is when TrueHash will establish the baseline for your mining hash rate.
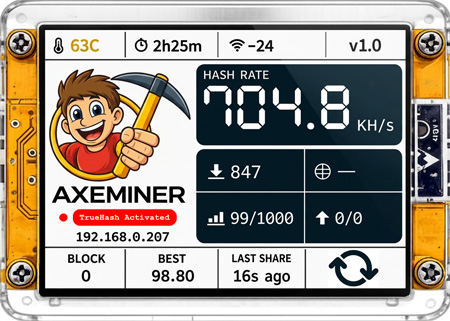
If your hashrate does not recover within a few minutes, take the following steps to get your device back on the right track:
1-Restart device, this will fix most issues.
2-Check the status and health of your WiFi connection.
3-Check the mining pool for outages, degradation, or other issues.
4-Check device temperature.
How Does TempSense Work?
For an ESP32 solo miner, such as Axeminer, thermal management is crucial because the dual-core chip operates at maximum compute capacity 24/7. Keeping the solo miner cool stabilizes your hashrate and prevents hardware degradation.
Unlike other ESP32 home miners (NMMiner, Nerdminer, Sparkminer), AxeMiner’s proprietary TempSense technology continuously monitors device temperature and alerts on thermal runaway, sudden spikes, or sensor failures.
The temperature reading at the top left of your Axeminer’s display has four distinct indicators:
TempSense Green: Chip temperature is ideal (under 70C). No action needed.
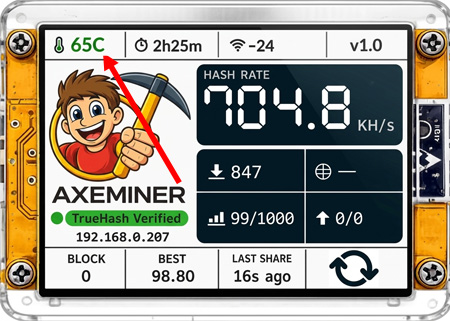
TempSense Amber: Chip Temperature is Warm (70-74C). Your device may be heating up. No immediate action is needed; this is just a flag to keep an eye on it.
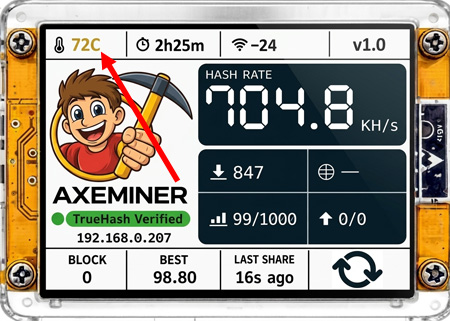
TempSense Red: Chip Temperature is Hot (75C+). Consider taking precautionary steps to prevent further heating. If the device reaches 80C it will start flashing red; at this point you may want to turn the device off. At 80°C sustained on an ESP32 running 24/7 you’re risking long-term damage to your solo home miner.
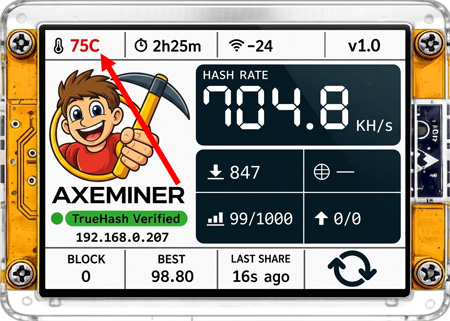
While the ESP32 chip itself can tolerate temperatures well above 80C, the TFT display, capacitors, and solder joints are far more vulnerable to sustained heat — and those are the components TempSense is really protecting.
Steps you can take to cool the device include:
1-Move the device to a cooler, well-ventilated location away from direct sunlight or heat sources. Ensure nothing is blocking the airflow around the device.
2-Point a portable fan at your AxeMiner, this helps to dissipate the heat.
3-Change your Screen Timeout settings from “Never” to 30 or 60 seconds. Your solo miner’s display generates a small amount of heat when turned on for extended periods of time. (As a side note, because the display does draw CPU resources, your AxeMiner hashes slightly faster while the screen is turned off.)
5-Avoid placing the device inside an enclosure or cabinet without ventilation
6-Elevate the device slightly to allow air circulation underneath
7-Avoid stacking multiple miners directly against each other
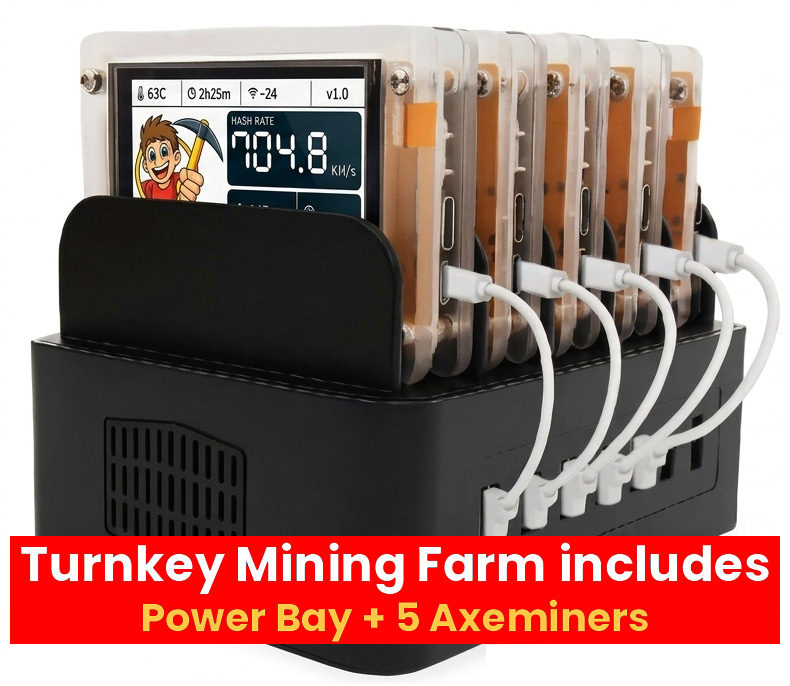
8-If running multiple units, space them at least a few inches apart (AxeMiner offers a product that allows you to store, and power, the units conveniently with a temperature blocking barrier between each unit.)
How Do I Access My Device Config?
Your device config is accessible when you initially setup your miner. If you need to adjust any settings after your device has been setup, you can access the config via your web browser by typing your miner’s IP address into the URL field of your browser. Please wait at least 60 seconds for the config menu to load in your browser.
When the config menu appears, click on “Configure WIFI”, and the config dashboard will appear within 60 seconds.
Note: The image below only shows the location of the IP address. Your AxeMiner has a unique IP address, it is not the one shown here. If you have multiple devices, each one will have its own unique address.
The browser-based config screen provides you with the ability to update the following settings at any time:
WIFI Network
WIFI Password
Primary and Backup Pool
Primary and Backup Wallet
Worker Name
Screen Timeout
Screen Brightness
Device Timezone
HTTPS Stats
Wi-Fi changes require a device restart; other changes apply immediately after pushing “Save”.
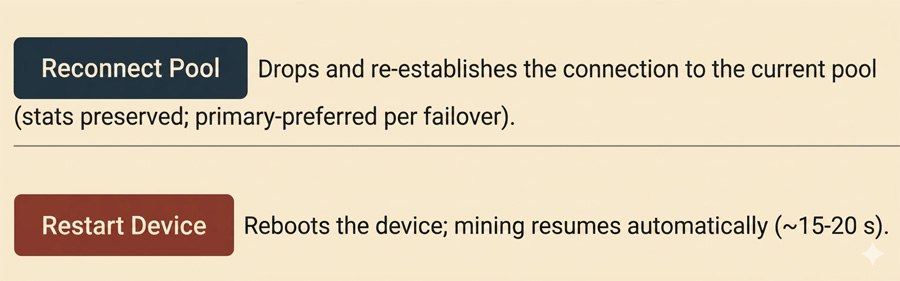
You can restart your device by pressing the “Restart Device” button located at the bottom of the browser-based config screen, or by unplugging your device from power for 30 seconds, and then plugging back in.
For WIFI changes you’ll need to hit “Save”, then wait for the config dashboard to re-populate, and then hit “Restart Device.”
Located directly above the above the restart button, is the option to “reconnect Pool”, which drops and re-establishes the connection to the current pool without resetting your mining stats.
How Do I Change My Mining Pool?
First, make sure it is a Bitcoin pool, and that it supports “non-ASIC” or “ESP32” miners like Axeminer. Visit Axefriendly.com for a list of pools that are compatible with your Axeminer.
You can change your pool at anytime by entering your device IP into your browser window. This will populate a config screen with fields to enter your pool URL, ports, and password which are provided by the pool operator.
Enter the mining pool URL without the stratum prefix. For example:
pool.axeminer.com
NOT
stratum+tcp://pool.axeminer.com.
Unless otherwise specified by pool operator, you can just put a “x” in the password fields.
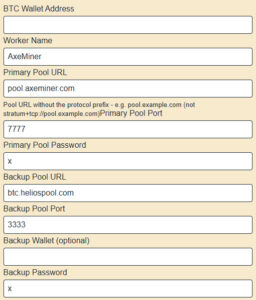
You don’t need to re-enter your WIFI credentials when you change your pool, your default credentials will stay intact. Just be sure to push “Save” at the bottom of the page after you’ve entered your new pool credentials.
How Do I Check My Mining Stats?
Toggle to the AxeArray screen for a live on-device summary of every miner sharing your wallet address.
Prefer a bigger view? You can also track your mining stats via wallet address at Axeminer.com, the default pool for your AxeMiner device.
Will My Axeminer make me Rich?
Probably not. Because global competition is incredibly fierce, the odds of a single home miner finding a Bitcoin block are mathematically lower than winning a multi-million dollar lottery, such as Powerball. Your machine could run for decades without earning any Bitcoin.
Although a Powerball ticket only gives you a single chance to win before the ticket expires, AxeMiner is a “perpetual lottery ticket” that provides up to 700,000 “tickets” per second for less than a penny per day in electricity cost.
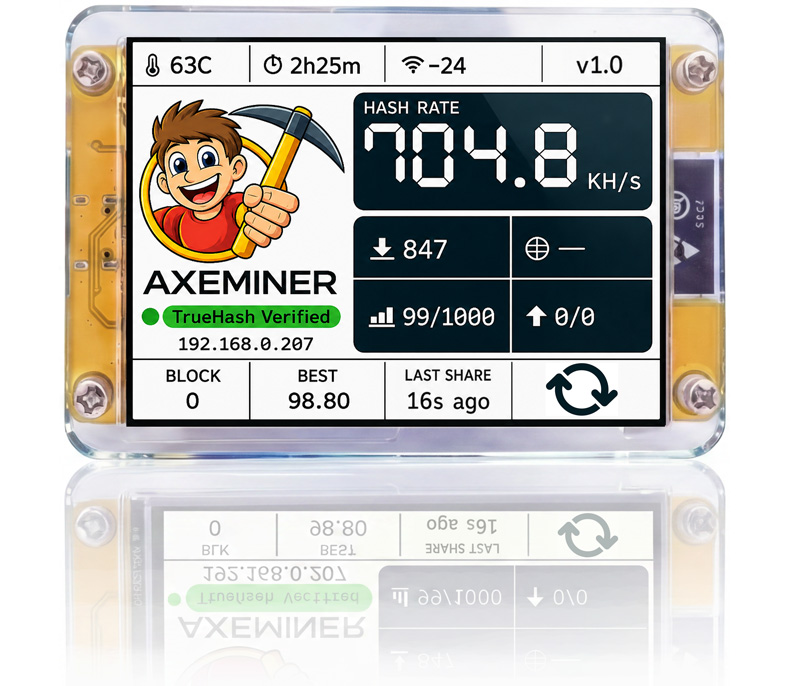
AxeMiner Solo Bitcoin Miner
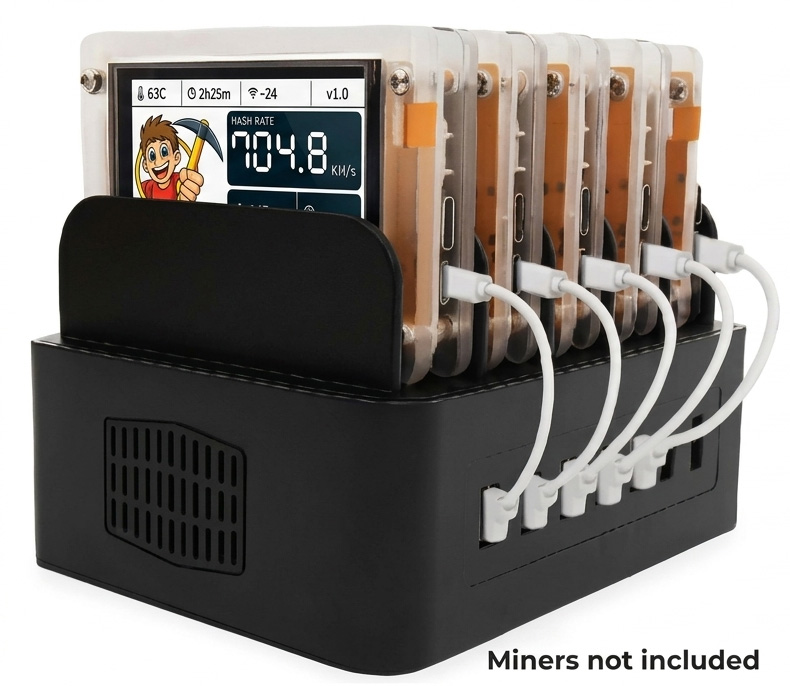
Smart USB Power Bay for AxeMiner